Discover a classic dessert that brings warmth and comfort to any gathering. 🥧 This old-fashioned apple crisp recipe, with its sweet and tangy apples topped with a perfectly crumbly, golden crust, is bound to become your favorite dessert! Whether you’re hosting a dinner or just craving something nostalgic, this recipe is a delightful treat for all.
Table of Contents
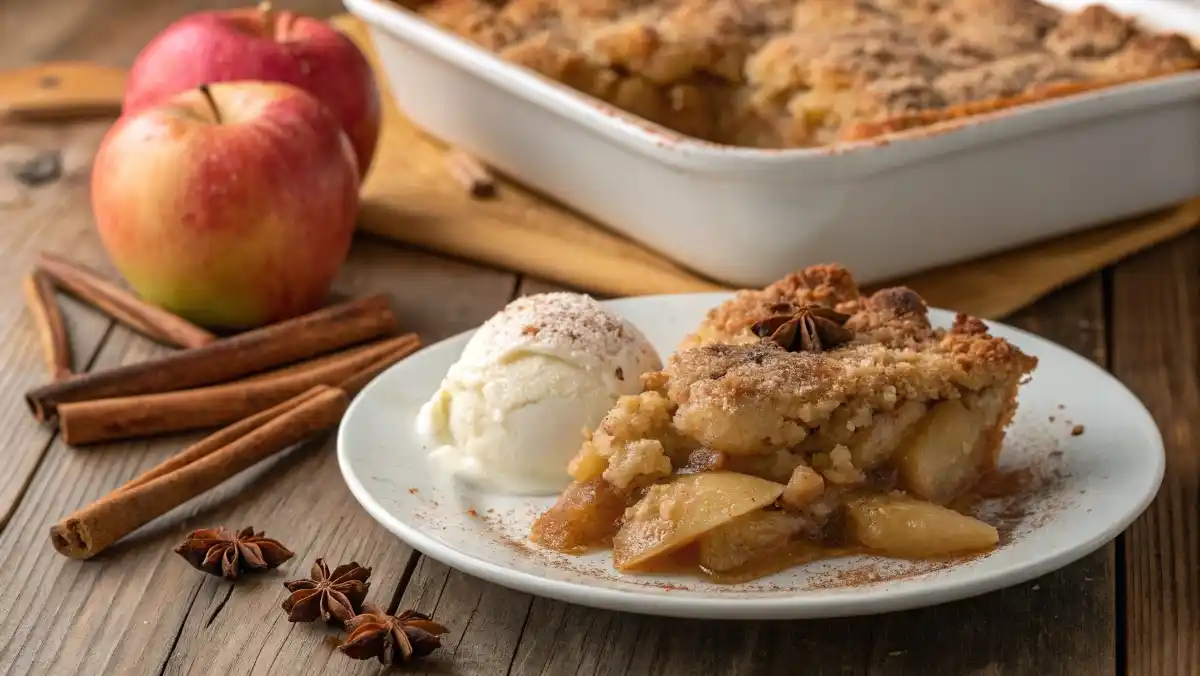
Old Fashioned Apple Crisp Recipe
There’s just something magical about the combination of warm baked apples and a crisp, buttery topping. It’s like taking a bite out of childhood memories! This old fashioned apple crisp recipe is simple, quick, and packed with flavors that transport you back to grandma’s kitchen. 🍎
Why should you try this recipe? First, it’s incredibly versatile. Whether you want to swap ingredients for dietary needs or add your own twist, this dish has endless possibilities. Plus, you’ll love the simplicity of its preparation. In no time, you’ll have a dessert that fills your home with a heavenly aroma.
Why Choose This Old Fashioned Apple Crisp Recipe?
Healthier Alternatives to Store-Bought Desserts
Store-bought desserts often come loaded with preservatives, artificial flavors, and hidden sugars. With this homemade apple crisp, you’re in control of the ingredients. It’s all about fresh, wholesome foods that you can feel good about eating.
The Nostalgia of Homemade Apple Desserts
Homemade desserts just hit differently, don’t they? This recipe carries the essence of old-world cooking—simple ingredients with maximum flavor. Every bite feels like a cozy hug on a chilly day.
Simplicity and Versatility of the Recipe
You don’t need fancy tools or advanced cooking skills to whip up this classic dessert. A few basic ingredients and a little love are all you need! What’s even better? You can customize it by adding nuts, raisins, or even a dash of caramel.
The History of Old Fashioned Apple Crisp
The Origins of Apple-Based Desserts
Did you know that apples have been a staple in desserts for centuries? From apple pies in Europe to cobblers in America, these sweet and tart fruits have charmed dessert lovers everywhere. Apple crisp, however, stands out for its simplicity and ease of preparation.
How This Recipe Became a Classic
Apple crisp rose to popularity during the 19th and 20th centuries, thanks to its affordability and use of pantry staples like oats and sugar. It became a favorite for home bakers looking to create something special without breaking the bank.
“An apple a day keeps the doctor away. But a warm apple crisp? That keeps the blues away!” 🍏
Ingredients for the Perfect Old Fashioned Apple Crisp Recipe
To make the perfect apple crisp, you need the right balance of sweet, tangy, and crunchy. Here’s a detailed list of ingredients:
| Ingredient | Quantity |
|---|---|
| Apples (Granny Smith or Honeycrisp) | 6 medium (peeled, cored, sliced) |
| Granulated Sugar | 1/2 cup |
| Cinnamon | 1 tsp |
| Nutmeg | 1/4 tsp |
| Lemon Juice | 1 tbsp |
| Old-Fashioned Oats | 3/4 cup |
| All-Purpose Flour | 1/2 cup |
| Brown Sugar | 1/2 cup |
| Unsalted Butter | 1/3 cup (cold, diced) |
| Optional: Chopped Nuts | 1/4 cup |
Step-by-Step Guide to Making Old Fashioned Apple Crisp
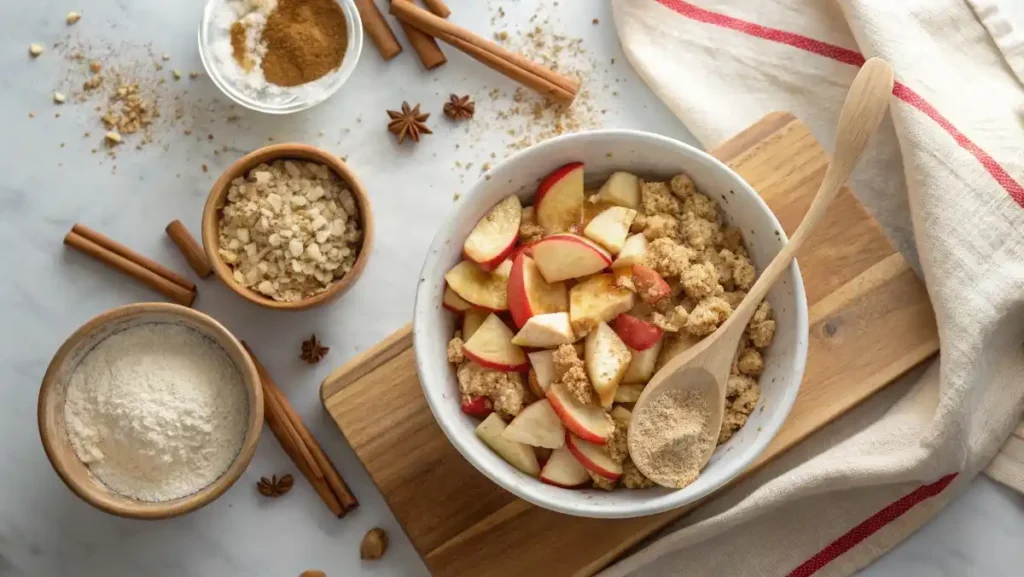
Preparing the Apples
Start by selecting the right apples. Granny Smith apples bring a tart kick, while Honeycrisp adds natural sweetness. Peel, core, and slice the apples evenly to ensure they cook uniformly. Toss them in a mixture of sugar, cinnamon, nutmeg, and a splash of lemon juice. The lemon juice keeps them fresh and adds a tangy balance. 🍋
Creating the Crumbly Topping
Ah, the topping—arguably the best part! Combine oats, flour, brown sugar, and diced cold butter. Use a fork or your hands to mix until the texture resembles coarse crumbs. If you’re feeling fancy, toss in some chopped pecans or walnuts for an extra crunch.
Assembling and Baking the Dish
Preheat your oven to 350°F (175°C). Spread the apple mixture evenly in a baking dish, then sprinkle the crumbly topping over it. Bake for 40-45 minutes or until the topping is golden brown and the apples are bubbling. Pro tip: Place the dish on a baking sheet to catch any spills!
“The aroma of baked apples and cinnamon wafting through your home is pure bliss. Don’t be surprised if neighbors come knocking!”
Tips and Tricks for a Perfect Old Fashioned Apple Crisp Recipe
How to Avoid a Soggy Bottom
Nobody likes a mushy dessert! To avoid this, pat the apples dry before tossing them in the sugar mixture. Also, keep the topping crumbly—not too wet.
Achieving the Perfect Golden-Brown Crust
Ensure your butter is cold when preparing the topping. This helps create that irresistible golden-brown crust.
Adjusting for Different Dietary Needs
Want a gluten-free version? Swap the flour with almond or oat flour. Need a vegan twist? Replace butter with coconut oil or vegan margarine.
Common Mistakes When Making Apple Crisp
Overmixing the Topping
Don’t overmix! The topping should remain crumbly, not doughy. Overmixing leads to a dense, less crisp topping.
Choosing the Wrong Apples
Soft apples like Red Delicious can turn into mush. Stick to firm, tart varieties like Granny Smith or Fuji for the best results.
Skipping Important Steps
Rushing through peeling or skipping the lemon juice might save time, but it can compromise the flavor and texture. Take it slow; it’s worth it.
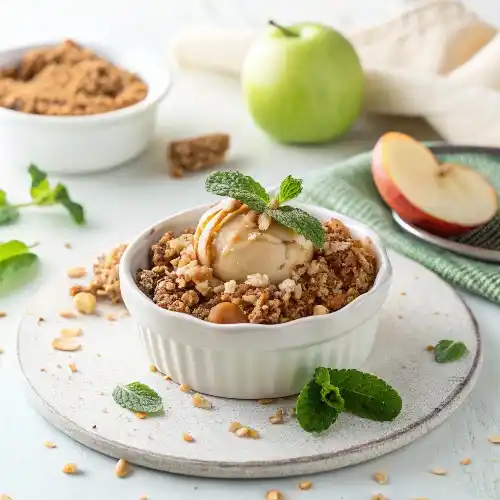
Pairing Ideas for Your Old Fashioned Apple Crisp Recipe
he Best Ice Cream Flavors to Serve Alongside
If ice cream isn’t your thing (is it even possible?), consider whipped cream for a lighter, airy texture. Want something richer? Pour warm custard over the crisp for an indulgent treat.
Healthier Variations of the Recipe
If you’re looking for ways to make this dessert a bit more guilt-free without sacrificing flavor, you’re in luck! Let’s explore some healthier alternatives.
Lower-Sugar Options
Cutting down on sugar is easier than you think! Swap out some or all of the sugar with these alternatives:
- Maple Syrup: Adds a warm, natural sweetness.
- Honey: Perfect for a light floral note.
- Coconut Sugar: A less-processed option with a caramel-like taste.
You can also reduce the sugar in the topping by letting the natural sweetness of the apples shine through.
Gluten-Free and Vegan Adjustments
Want to make this recipe gluten-free or vegan? No problem! Here’s how:
- Gluten-Free Option: Replace all-purpose flour with almond or oat flour. Make sure to use certified gluten-free oats.
- Vegan Option: Swap out the butter for coconut oil or vegan butter. Add a sprinkle of shredded coconut for extra texture.
Incorporating Superfoods for a Nutritional Boost
Who says dessert can’t be healthy? Add these superfoods to the mix:
- Chia Seeds or Flaxseeds: Sprinkle into the topping for extra fiber.
- Almond Butter: Swirl into the filling for added creaminess.
- Walnuts or Pecans: Not just for texture—they’re packed with omega-3 fatty acids!
Storing and Reheating Leftover Apple Crisp
So, what if you don’t finish your apple crisp in one go (though that’s hard to imagine)? Let’s talk about storage and reheating so your leftovers stay just as delicious.
Proper Storage Methods
Once your crisp has cooled, transfer it to an airtight container. It can be stored in the fridge for up to 4-5 days. For longer storage, freeze it! A baked apple crisp can be frozen for up to 3 months—just wrap it tightly in aluminum foil before freezing.
Best Techniques for Reheating
Reheating your apple crisp is crucial to maintaining that crunchy topping. Here’s how:
- Oven: Reheat at 350°F (175°C) for about 15-20 minutes. Cover with foil for the first 10 minutes to prevent burning the topping.
- Microwave: This works in a pinch but may soften the topping. Use medium power for 1-2 minutes.
Pro Tip: Add a small pat of butter to the topping before reheating for extra richness.
Serving Suggestions and Presentation Tips
Presentation matters, even for a humble dessert like apple crisp. Here are some creative ways to elevate your serving game:
How to Plate Your Apple Crisp
For a rustic feel, serve the crisp straight from the baking dish. Want something a bit fancier? Scoop individual portions into small ramekins or dessert glasses.
Garnish Ideas for an Elegant Touch
The simplest garnishes can transform your dessert. Try these ideas:
- A dusting of powdered sugar for a snowy effect.
- A drizzle of caramel sauce for added decadence.
- Fresh mint leaves or a cinnamon stick for a pop of color. 🌿
“A little garnish is like jewelry for your food—it takes it from good to gorgeous!”
FAQs About Old Fashioned Apple Crisp Recipe
Here are more frequently asked questions to make sure you’ve got all the answers before diving into your apple crisp adventure.
- Can I prepare the topping ahead of time?
Absolutely! You can make the topping and store it in the fridge for up to 3 days. - What if I don’t have oats?
No worries—crushed graham crackers or cornflakes work as a substitute. - How can I make my apple crisp extra crunchy?
Add a handful of chopped nuts to the topping or sprinkle some granola over it before baking. - Can I use frozen apples?
Yes, but thaw them first and pat them dry to avoid excess moisture. - What’s the best way to prevent the apples from being too mushy?
Use firm apple varieties and don’t overbake the crisp. - Can I use other fruits instead of apples?
Absolutely! Pears, peaches, or mixed berries work wonderfully. Just adjust the sugar based on the fruit’s natural sweetness. - What’s the best way to make this dessert ahead of time?
Prepare the apple filling and topping separately. Store them in the fridge, and assemble just before baking. - How do I keep the topping crisp during storage?
Store leftovers in an airtight container and reheat in the oven instead of the microwave to maintain the crisp texture. - Can I make this recipe without oats?
Yes! Substitute oats with more flour or even crushed graham crackers for a unique twist. - Is this dessert freezer-friendly?
Definitely. Freeze the baked crisp and reheat it in the oven when ready to serve. - What’s the ideal serving temperature?
Serve it warm for the best experience. Pair it with a scoop of vanilla ice cream or whipped cream for perfection! - Can I reduce the sugar in the recipe?
Of course! You can halve the sugar in the filling and topping without losing flavor. - How do I prevent the apples from turning brown while prepping?
Toss them in lemon juice or keep them submerged in water until ready to use. - What kind of baking dish is best for apple crisp?
Use a glass or ceramic dish for even baking and better presentation. - Are nuts essential in the topping?
Not at all! They’re optional and can be left out if you prefer a nut-free dessert.
For a guilt-free indulgence in the morning, you might enjoy learning how to eat a brownie every day and stay healthy: Eat a Brownie Every Day and Stay Healthy.
Wondering if you can swap ingredients for a quicker breakfast fix? Discover whether you can use crescent rolls instead of puff pastry in your recipes: Can I Use Crescent Rolls Instead of Puff Pastry?.
more suggestions for Further Reading
- Ultimate Guide to Vegan Lunch Ideas That Actually Excite You
- Moe’s Burrito Bowl Recipe: A Flavored Feast You’ll Love
- Lunch Ideas for Picky Eaters: Fun, Easy, and Tasty
Conclusion: Why This Recipe Stands Out
There’s a reason why the old fashioned apple crisp recipe has stood the test of time. It’s simple to make, endlessly customizable, and delivers a comforting dose of nostalgia with every bite. Whether you’re serving it at a holiday gathering or enjoying a quiet night in, this dessert feels like a warm embrace, filling your home with the aroma of baked apples and cinnamon. 🍎
What makes it even better is how easily it can be adapted for different preferences and dietary needs. From lower-sugar options to gluten-free twists, this recipe is as flexible as it is delicious. And let’s not forget—nothing beats the satisfaction of creating something so special from scratch.
So, go ahead, grab your apples, preheat that oven, and let this classic recipe work its magic. Don’t be surprised if it becomes a family tradition—you might even find yourself reaching for it again and again, just like grandma did.
“Good food is all the sweeter when shared with those you love. And what could be sweeter than a warm dish of apple crisp?”
Bon appétit! 🥧